User Accounts – Access Rules
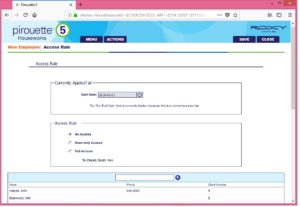
Access rules allow you to specify a user’s level of access for a specific client. Access rules are only enabled if access limits are enabled centrally – in which case access rules allow you to override the central access limits configuration.
To create a user account access rule:
1. Open the employee’s user account (central menu → System → Users → Active Users) and use the Next button to go to the Access Rules section.
2. Select the Create icon located in the upper right corner to create a new access rule record.
3. Select the desired access level from the Access Rule section and select the client name from the client list provided. Once selected the client name will appear in the To Client space.
4. When you are finished, save and close the record.
If you wish to create another access rule for another client, repeat steps 2-4. Create as many rules for the user as needed.
Tip: if at some later time the access rule no longer applies, return to the record and uncheck the Currently Applies checkbox; this will bring the End Date field into view.
If the attendance module is enabled in your system, use the Next button to go to the Rates section of the record in order to configure this section.
Continue to User Accounts – Rates
Otherwise, use the Next button to go to the Reports section of the record to see the reports you can access from the user account.
Back to Table of Contents

